
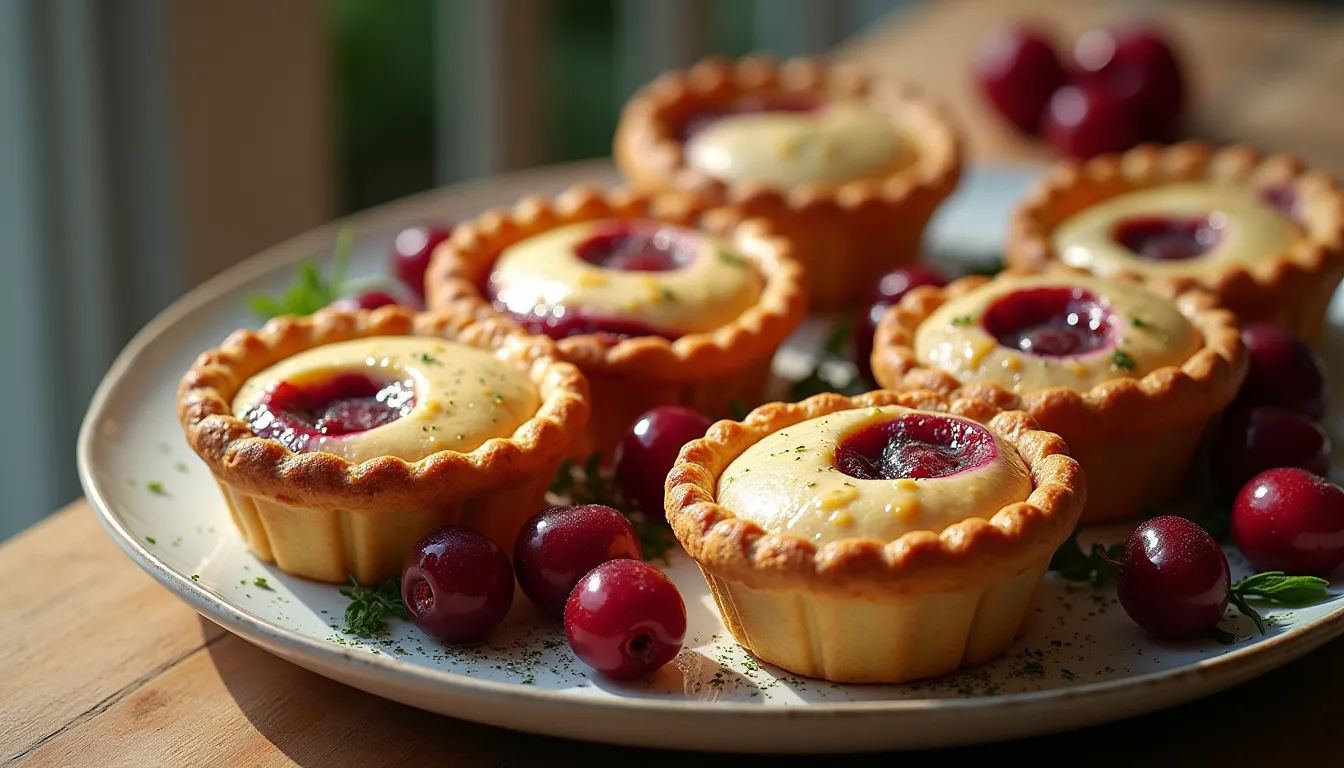
Mini-Cherry Pies
Tiny pies, HUGE flavor! 🍒🥧 Sweeten your day with these mini delights.😋
1. Let’s Start Here:
Mini-Cherry Pies are delightful, bite-sized treats bursting with sweet and tart cherry filling. These adorable pies are perfect for parties, picnics, or simply satisfying your sweet tooth.
2. Ingredients:
- 2 pounds sour cherries, pitted
- 2 tablespoons cornstarch
- 4 cups all-purpose flour
- 3/4 cup granulated sugar, divided
- 3 tablespoons heavy whipping cream
- 1 tablespoon fresh lemon juice
- 1/2 cup toasted pecans
- 1/4 cup turbinado sugar
- 1 cup cold unsalted butter, cut into ½- inch cubes
- 1 teaspoon pure vanilla extract
- 2/3 tablespoon cup plus 2 cold water, divided
3. Cooking Guide:
Begin by preparing the pie crust and cherry filling. Roll out the dough, cut out small circles, and press them into muffin tins. Fill each crust with the cherry mixture, top with more dough or a crumble, and bake until golden brown.
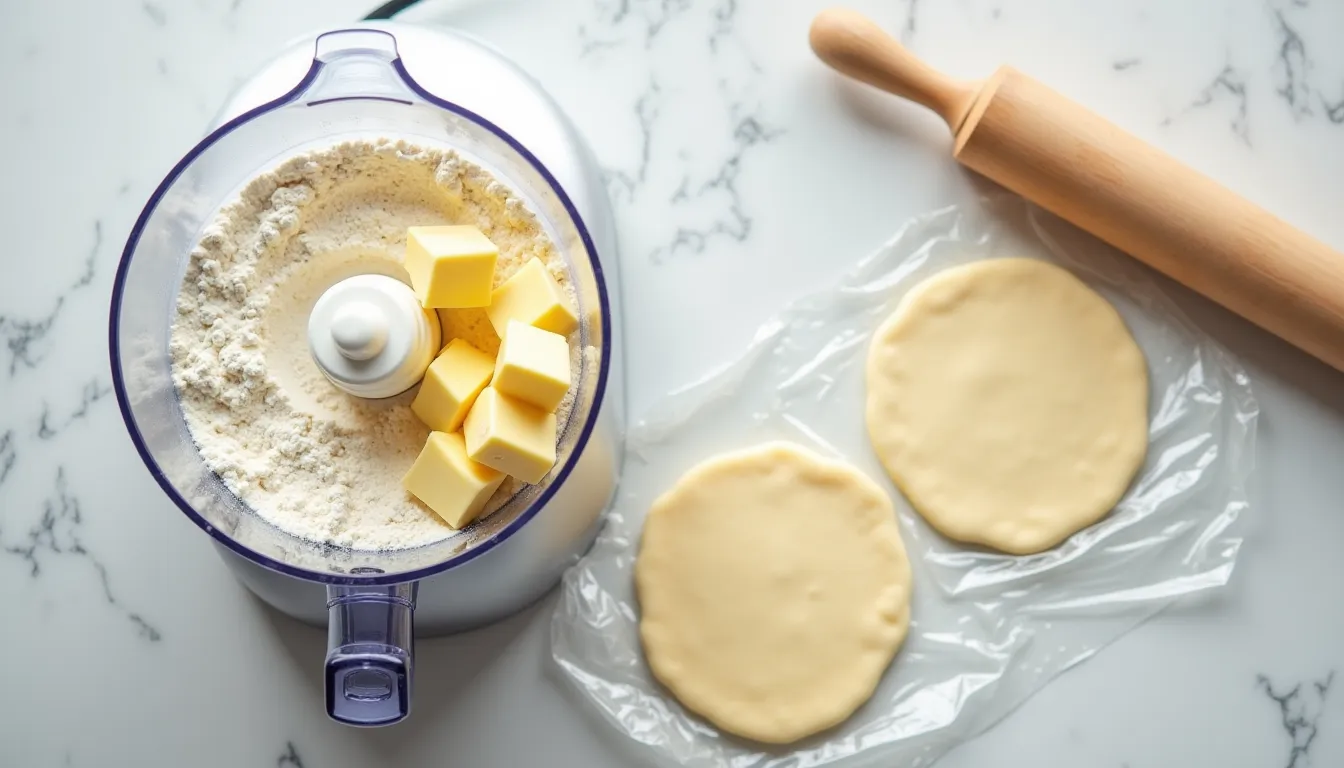
Step 1: Prepare the Dough
Combine butter and flour in a food processor, pulsing until crumbly. Gradually add cold water until a ball forms. Divide into two disks, wrap in plastic wrap, and refrigerate for 1 hour. Preheat the oven to 175°C. Roll out one disk to 3mm thickness and fit into mini pie plates. Freeze for 10 minutes and prick with a fork.
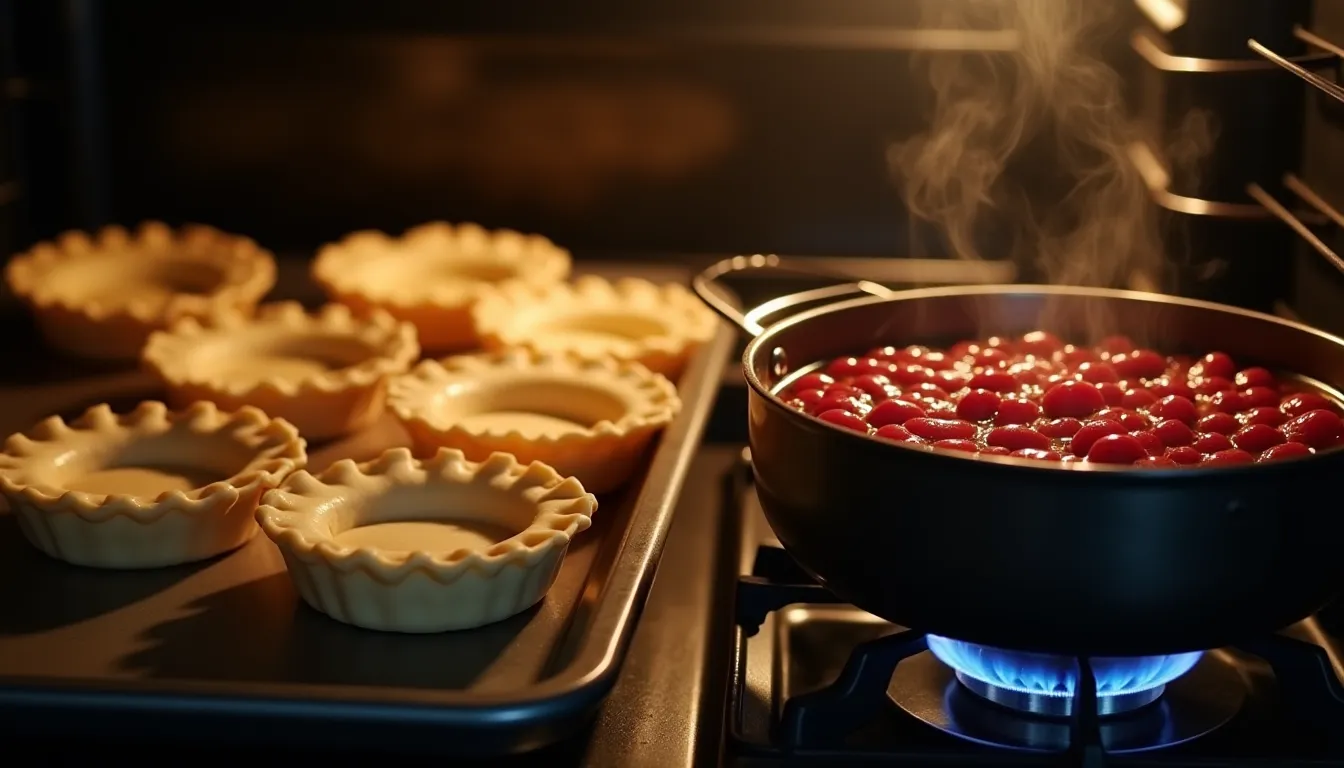
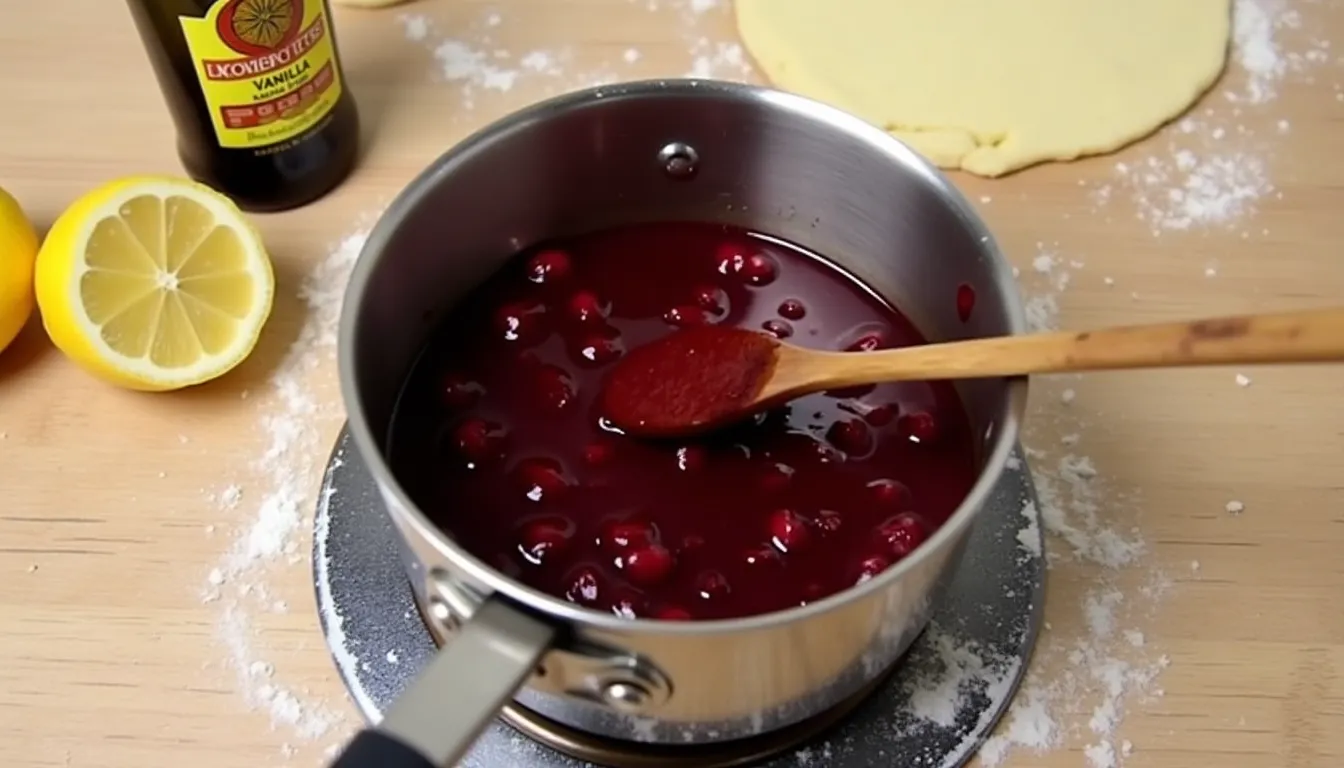
Step 2: Partially Bake Crusts & Prepare Filling
Bake the mini pie crusts until golden, about 6-8 minutes. In a small bowl, mix cornstarch with water until blended. In a saucepan, combine cherries, cornstarch mixture, sugar, and salt. Cook over medium heat until cherries soften and the mixture thickens.
Step 3: Add Flavor & Roll Out Top Crust
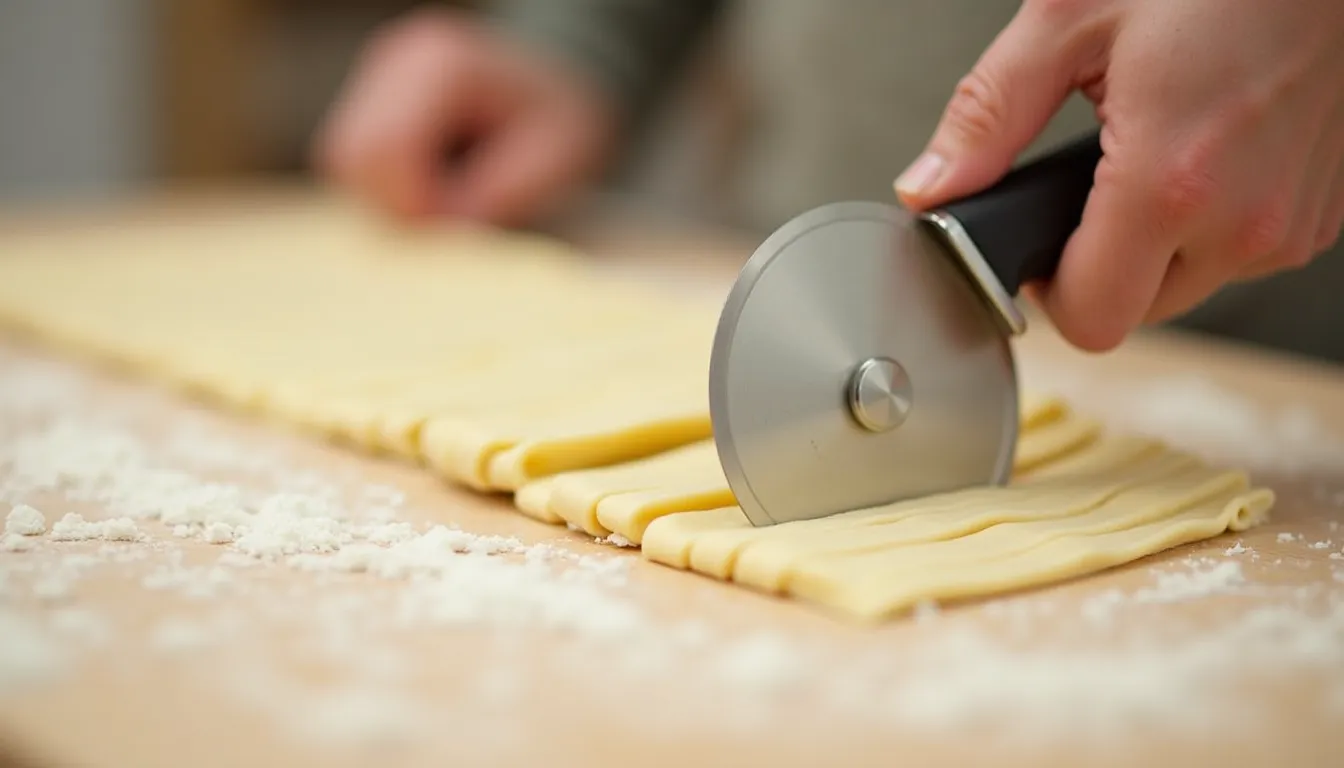
Stir lemon juice and vanilla extract into the cherry filling until combined. On a lightly floured surface, roll the remaining pastry disk to a 3mm thickness. This will be used for the lattice topping.
Step 4: Cut Dough Strips
Cut the rolled-out dough into very thin strips, about 3mm to 6mm wide. These strips will be woven into a lattice pattern for the top of the mini pies. Accuracy is key for an even and beautiful lattice.
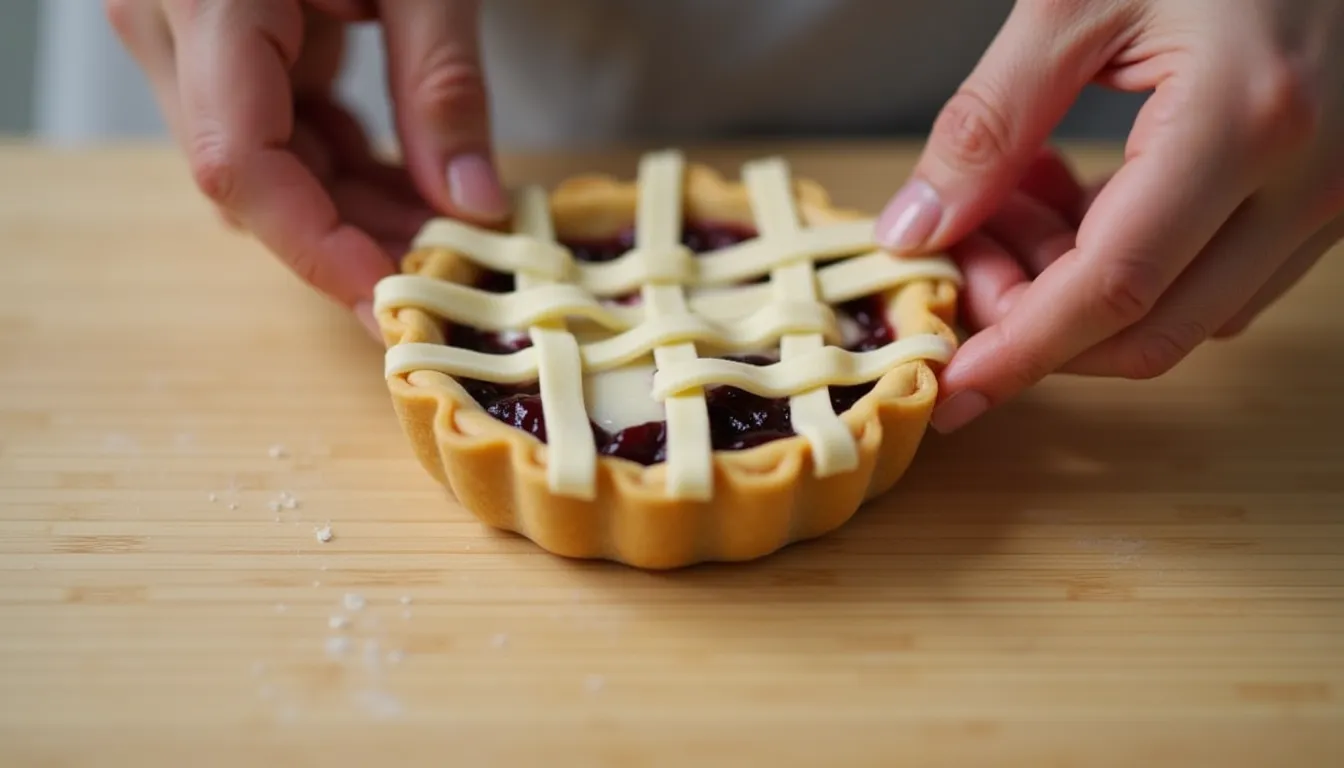
Step 5: Weave Lattice Tops
Arrange dough strips vertically to create a base. Weave horizontal strips through the vertical ones, lifting and returning strips as needed to create a tight lattice. Transfer the woven lattice carefully to the prepared pie plates, and trim the edges for a clean look. Seal the lattice edges to the pie crusts.
Step 6: Brush with Cream
Gently brush the top and edges of the dough lattice with cream. This will help the crust achieve a beautiful golden-brown color during baking and add a subtle richness to the flavor.
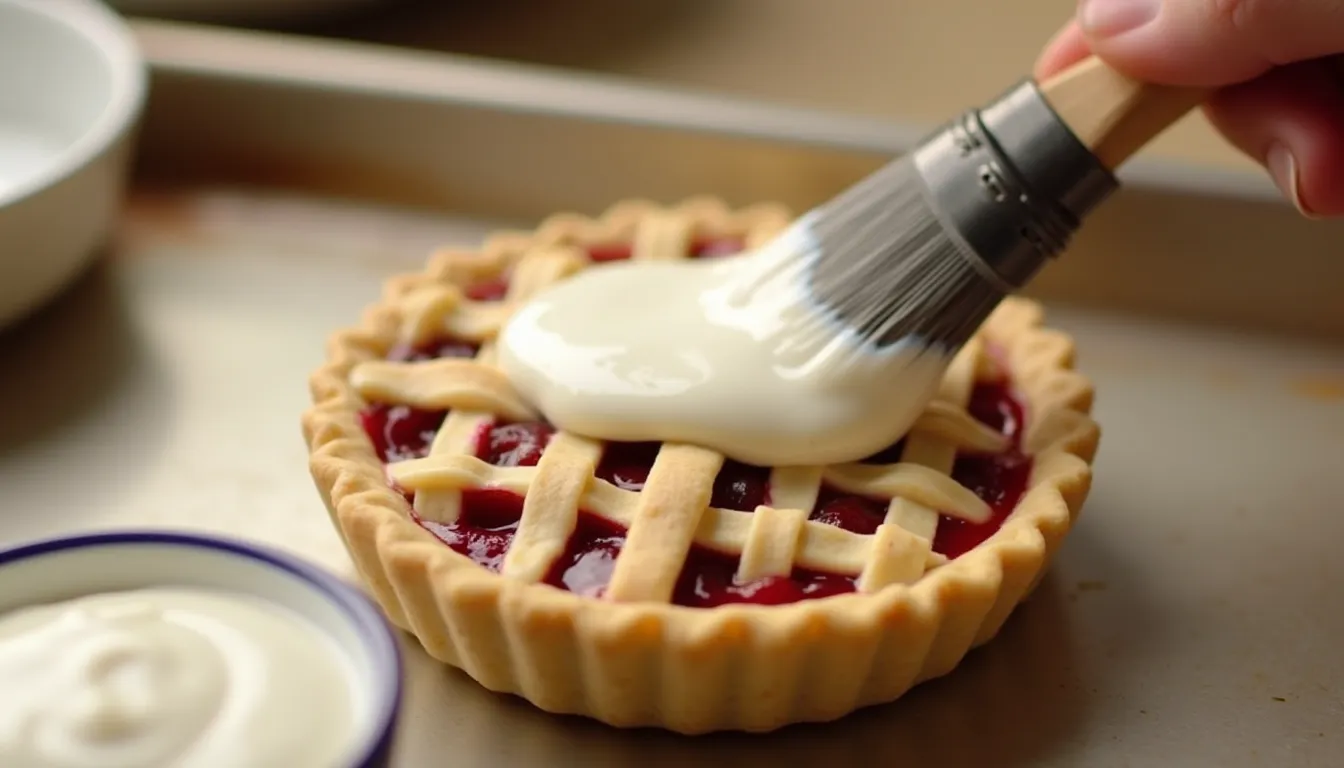
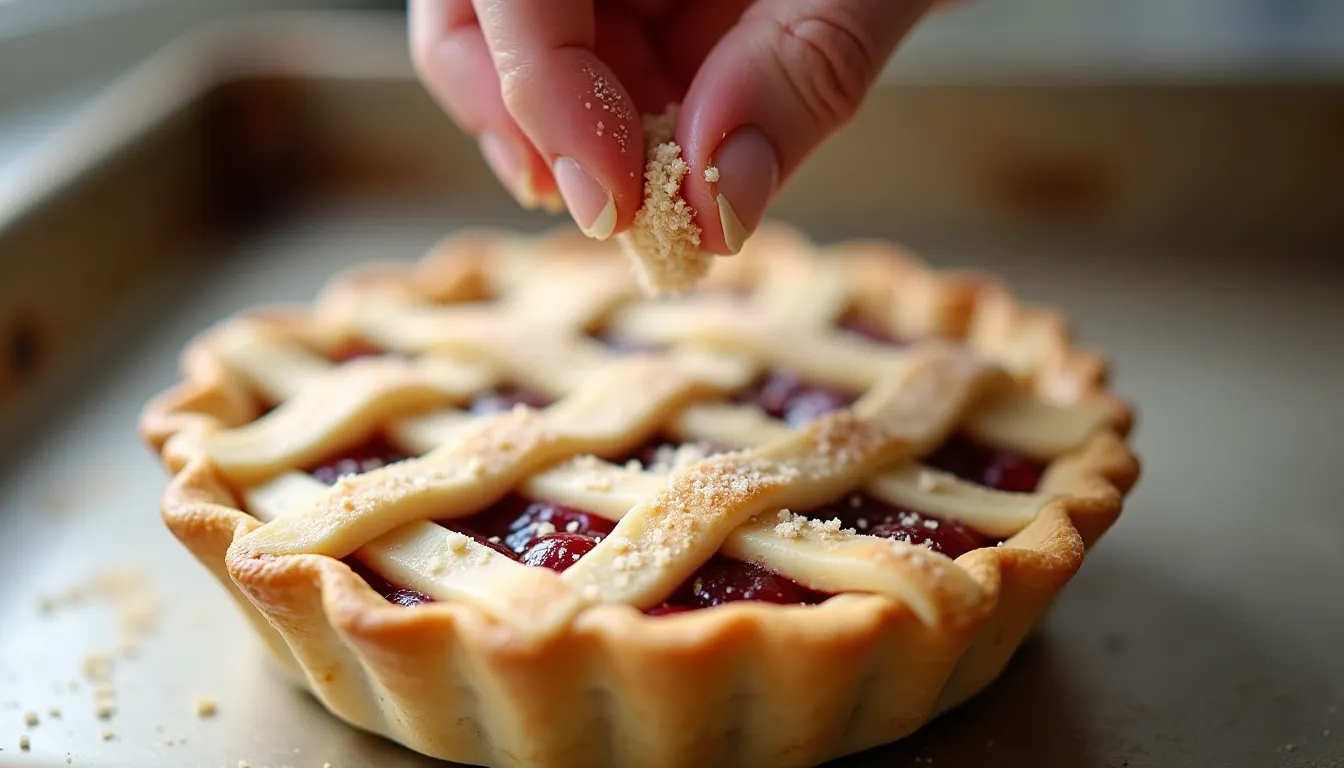
Step 7: Sprinkle with Sugar
Sprinkle the top of each pie with 1 teaspoon of turbinado sugar. This coarse sugar adds a delightful crunch and a hint of caramel flavor to the baked pies.
Step 8: Bake to Golden Perfection
Bake the mini pies until the crusts are a deep, golden brown, approximately 18 to 24 minutes. Keep a close eye on them to prevent burning. The lattice should be crispy and the filling bubbly.

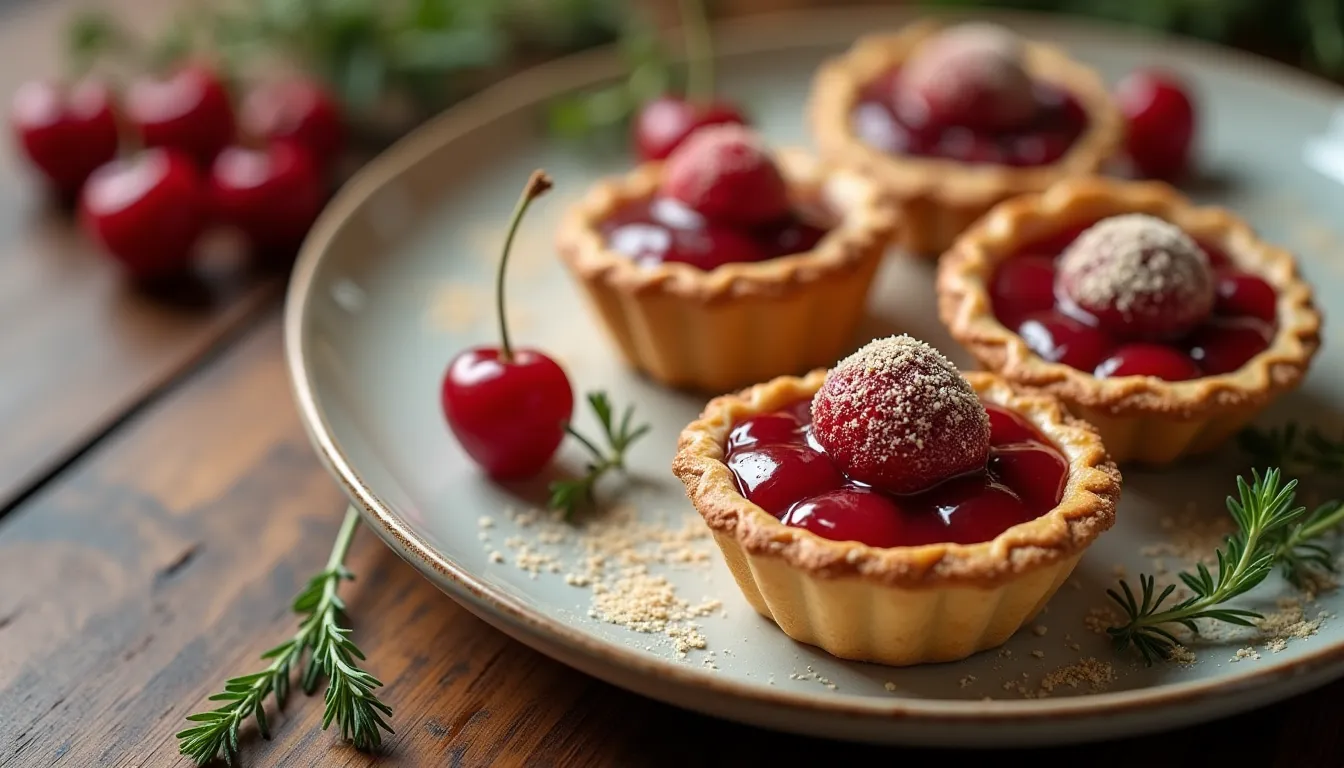
Step 9: Serve and Enjoy
Serve the mini cherry pies warm. For an extra treat, add a scoop of vanilla ice cream on top. The combination of warm pie and cold ice cream is a delightful way to end a meal.

4. Serving Suggestions
Serve the mini-cherry pies warm or at room temperature. They are delicious on their own or with a scoop of vanilla ice cream or a dollop of whipped cream.
5. Nutrition
Serving size: 12 servings, Calories: 447kcal, Protein: 6g, Fat: 20g, Carbohydrates: 63g, Fiber: 3g, Sugar: 27g, Cholesterol: 45mg, Sodium: 4mg
6. One Last Bite:
Mini-Cherry Pies are a delightful way to enjoy the classic flavors of cherry pie in a fun and convenient format. Perfect for sharing and sure to bring smiles to everyone's faces!


0 Comments
We’d love to hear your thoughts! Please keep comments kind and on-topic 💬